Saturday, January 4, 2014

7 Days Until "Done Enough"

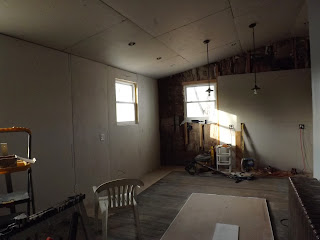
 We had one week to do the kitchen, so the day after Christmas we moved out of the kitchen and began demo. Overall everything went as expected. With a house this old we figured nothing would be level or square and our suspicions were confirmed. We did not actually get it completely done, but at this point it is done enough. Since we are both going back to work we will have to finish when we have time. We still need to paint, put in the island, tile the back splash and finish the floor. I thought I would share some pics of our progress. I am anxious to get it done so I can post the actual finished project!
Day 1 demo, my awesome brother appears like an angel to help us out.

At the end of day 1 the kitchen is empty.

End of Day 2

Day 3

Day 4 featuring the electric man.

I should have hidden the chairs.

Day 5 

Day 6

The greatest plumber and carpenter we know, Tony's Dad Marshall.

Not the original sink we picked out. The first one was rejected by the above mentioned plumber with a slight scolding on choosing the proper sink. He knows best, so we made yet another trip to Lowe's to buy a new sink. We are so glad we did it. This sink is beautiful in person.

Day 7: The floor had several boards that were rotted under the cabinets. We put new oak hardwood planks in to patch it up and with a good sanding and some stain it will look great (I hope).

The coffee bar area was a must for me.

We are not putting in upper cabinets. We want to keep the kitchen open, so we are putting shelves on both sides of the window for our dishes. I guess this will be a good excuse to get nicer dishes.

Love the pantry!

Tony & Cameron planned the location of the hood before any cabinets were installed. They did a perfect job of lining it up with the range. Tony mapped out and measured everything perfectly for the entire kitchen. Cameron installed an enormous amount of outlets so no more power strips. My kitchen is on multiple circuits so I can run all my appliances at once without blowing a breaker.  They went the extra mile and vented it outside. I love the lights on the hood.

The light over the sink is one of the antique lights that my friend Catherine Hackman gave me from her house remodel. A coat of paint and it looks great over the window. We have white subway tile back splash to put up and the walls will be the same grey on the dining room. When the island goes in the table will move over the the other side of the kitchen. Cameron already has the wall wired for hanging the TV and it is loaded with ethernet jacks for a computer. 


Thursday, December 12, 2013

It Was a Big Deal $$$


  I have been absolutely bursting to blog about the great deal we got on our windows. We are prepping the kitchen to tear out and replace the cabinets the week after Christmas. We've been buying everything we need in advance and trying to stick to a budget. Thankfully and strangely we have come in under budget on several items. It was time to buy the windows and we knew that one would need to be special ordered.

  Now let's get to the deal. While the salesman was pulling up the price for the window, we wondered around looking at windows in stock. We found special ordered windows that had been returned. The sizes were a bit different than we were looking for, but since we are tearing out walls it didn't really matter. Retail for these Pella 350 series triple pane, double hung windows $325.00 each...clearance sticker $100.00... at the register $75.00. Oh yeah, $1,000 worth of windows for $225. These are Pella's most energy efficient windows. I could go on and on about the savings, but at the risk of turning this blog into a major math problem I will just stop. I do want to thank the customer that special ordered and returned these windows. Merry Christmas to the Lipperts!

It is a good feeling to know that the insulation we blew in filled the walls so well.

Our neighbor asked if Tony was going to get to rest after this project. Uh, no, but I might make him a sandwich.


Saturday, November 16, 2013

An Update Long Overdue

  So often we focus on updating what everyone else can see and we neglect the most important parts of our home. Tony and I are so guilty of doing this. We've lived in the house for ten years knowing the boiler needed to be updated. This was one of the projects we knew would be extremely costly and really not as exciting as new paint, floors or cabinets. We really should have done this years ago. The energy cost savings would have paid off the cost of the boiler by now. Well that is all in the past now, because the new boiler is installed and working beautifully.
  
  I wanted to blog about this because I have had so many people question why we are replacing the boiler and not installing a forced air furnace. For me eliminating the boiler and radiators is not negotiable. Everything we have done in this house we have tried very hard not to compromise the character of the house. We are not trying to hide the age of the house. It is old, all over, from the claw foot tub in the bathroom, to the antique light fixtures, to the push button light switches. Don't get me wrong, we have plenty of modern here, wall mounted surround sounds speaker jacks, TVs on the wall, recessed lights, etc...

  We are not blind to the fact that things do have to be safe and efficient. We knew this boiler was old, but really when you shock every heating/cooling guy that comes to look at it you know it is time to update the system. The manufacturer of our original boiler sent a rep to look at it and they told us it is eighty years old. I'm thinking that the home owner really got their moneys worth when they bought that boiler. And the fact that the manufacturer is wanting to purchase the door from our boiler with their name on it you know she's something special. 

  Forced air has it's good points I'm sure. For us it came down to a few definite reasons we would not install it. First of all the cost would be extreme. Huge house, duct work from scratch, no way. Plus forced air creates more dust, this girl hates to dust. And let's face it, I straight up love my old antique radiators. I cannot imagine getting rid of them. If this effects resale later for us then I guess we will stay here. I can't imagine anyone would ever buy this house that didn't have a love for the old.

  I have to add one more comment. Our heating guy told us that he will almost bet that the electric/gas company will come and install a new meter when they notice the drop in our usage. I found this rather funny and a little sad. Our heating bills during a cold winter have exceeded $700 per month in the past. I do hope that Ameren doesn't have to lay off workers in their loss of revenue. I'll let you all know if they change the meters.

The old boiler...yikes

Weil McClain 


This old guy used to run on coal and was converted to gas.

The new guy just moved in next to the old. 

These radiators are hotter than they ever were before. I'm guessing the cats will rethink laying on them now.


Saturday, November 2, 2013

Taking it One Room at a Time....


Finally something to blog about! However, this time I think this post must be told with pictures over words. I mean really, everyone prefers a picture over a thousand words. I do regret I can't give you pop up pics.


Obviously this is not the finished look we are planning for the floor. Funds require we wait to do the floor.


This light is one of my favorite additions to the room. Cameron and I really wanted to light up the shelves, but just couldn't get any cabinet lighting to work out. Then a light bulb went on in my head (ha, get it?) and we remembered this amazing light fixture given to me by my friend Catherine. It is a brass fixture that had been painted white. We tried to match the finish on our other antique fixtures and I think it turned out very well. (By the way, check out her website, she is a terrific author. http://www.catherinehackman.com/)
I absolutely love how the radiator turned out. I used hammered bronze paint. I also love that we used our original antique light fixtures. They really pop against the grey walls. They have all been re-wired so everything about them is 1890's except the wiring. Safety first. 


My favorite little corner of the dining room. 
This wall will display three of our favorite movie posters (yet to be agreed upon).


Saturday, July 13, 2013

Oh Buttons!

   So I'm always saying I should hang onto this because someday I might need it, or I may make something out of it or it might be worth something some day, yada, yada.... Well this time I actually did use it. I saved a Mason jar full of vintage buttons with the idea that maybe I could use them for scrap booking, plus they just looked kind of cool in the jar. That was about ten years ago, so better late than never. 
   A couple weeks ago I purchased a couple of old pictures at an auction for just $3.00. Bidding on these pictures meant I had to take the whole lot of miscellaneous pictures and frames along with it. I really thought I would just bring them home and throw them away, even though the hoarder in me always says no. Of course when I got home I decided to save them because that's what I do. Today, Cori and I decided to make good use of the frames, buttons and our precious mother~daughter time. So here's how it went...


First step was to gather supplies; Buttons, frames, glue gun, daughter....
We laid out the buttons for a practice run before using the glue. We decided to do an "L" for our initials, but I think next time maybe a heart would be fun.


We painted the frames a flat black. Mostly because that was what we had in the garage, but we liked it too.


And the finished product looks so cute! The photos do not do them justice. I plan to hang the first one in my mudroom and Cori is hanging the other in her room. I should also remind you that these cost me $0.00 to make!

Friday, January 25, 2013

Bitter Sweet....


  Any of you that know me very well, or have read in my blog, may know that I have a particular fondness for my old kitchen cabinets. I have been determined to save these cabinets throughout the remodel. I had a plan to scrape, sand, paint, add new hardware and repair any damage the best I could. That was the plan...

  However with all that we have put the kitchen though at this point many factors are effecting the decision to keep or replace the cabinets. Since the cabinets are built onto the wall, we cannot remove them, this has been an issue on more than one occasion. Without going into all the many details, the list on cons keeps growing, clearly outweighing the pros of keeping the cabinets. 

  We have old floor damage under the sink that we cannot properly repair without removing the cabinets. We also cannot insulate the wall behind the cabinets and the bottom cabinets are like refrigerators in the winter. We have issues with hanging drywall around them and the removal and replacing of the roof caused them to pull away from the wall (a problem we cannot resolve).

  As much as I want to preserve the character they bring to the kitchen, I also do not want to compromise the integrity of our work. So as sad as it makes me and aside from the expense, I do know that I will love all the good things new cabinets will bring. Not to mention Cameron is thrilled (he did NOT want to keep the old cabinets as he has a fondness for all things new.) I will need to mention this will extend the time we can finish due to expense, so if it annoys you that we are taking so long to finish the remodel...prepare to be really annoyed.

Sunday, December 16, 2012

I was not allowed to post this on facebook, so I am posting it on my blog that my son claims nobody reads. So here it is, Cameron singing in the cantata at church.